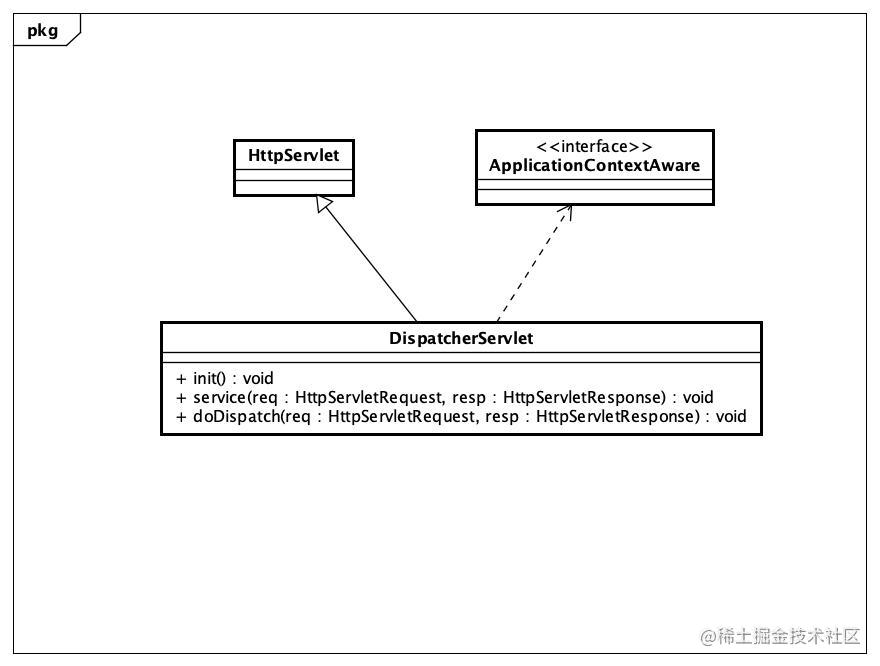
本篇我们将开始研发SpringMVC中核心组件DispatcherServlet
13.1 开发步骤讲解
本节源代码的分支:dispatcherServlet
DispatcherServlet
DispatcherServlet 继承自 HttpServlet ,通过使用 Servlet API 对 HTTP 请求进行响应。其工作大致分为两部分:
- 初始化部分,当Servlet在第一次初始化的时候会调用 init方法,在该方法里对诸如 handlerMapping,ViewResolver 等进行初始化,代码如下:
@Override
public void init() {
    this.handlerMapping = this.applicationContext.getBean(HandlerMapping.class);
    this.handlerAdapter = this.applicationContext.getBean(HandlerAdapter.class);
    this.viewResolver = this.applicationContext.getBean(ViewResolver.class);
}- 对HTTP请求进行响应,作为一个Servlet,当请求到达时Web容器会调用其service方法; 通过
RequestContextHolder在线程变量中设置request,然后调用doDispatch完成请求
@Override
protected void service(HttpServletRequest request, HttpServletResponse response) throws ServletException, IOException {
    logger.info("DispatcherServlet.service => uri:{}", request.getRequestURI());
    RequestContextHolder.setRequest(request);

    try {
        doDispatch(request, response);
    } catch (Exception e) {
        logger.error("Handler the request fail", e);
    } finally {
        RequestContextHolder.resetRequest();
    }

}在doDispatch方法中的执行逻辑
- 首先通过handlerMapping获取到处理本次请求的
HandlerExecutionChain - 执行拦截器的前置方法
- 通过
handlerAdapter执行handler返回ModelAndView - 执行拦截器的后置方法
- 处理返回的结果
processDispatchResult - 在处理完成请求后调用
executionChain.triggerAfterCompletion(request, response, dispatchException);,完成拦截器的afterCompletion方法调用
private void doDispatch(HttpServletRequest request, HttpServletResponse response) throws Exception {
    Exception dispatchException = null;
    HandlerExecutionChain executionChain = null;
    try {
        ModelAndView mv = null;
        try {
            executionChain = this.handlerMapping.getHandler(request);

            if (!executionChain.applyPreHandle(request, response)) {
                return;
            }
            // Actually invoke the handler.
            mv = handlerAdapter.handle(request, response, executionChain.getHandler());

            executionChain.applyPostHandle(request, response, mv);
        } catch (Exception e) {
            dispatchException = e;
        }
        processDispatchResult(request, response, mv, dispatchException);
    } catch (Exception ex) {
        dispatchException = ex;
        throw ex;
    } finally {
        if (Objects.nonNull(executionChain)) {
            executionChain.triggerAfterCompletion(request, response, dispatchException);
        }
    }

}processDispatchResult方法中又分为两个逻辑,如果是正常的返回ModelAndView,那么就执行render方法,如果在执行的过程中抛出了任何异常,那么就会执行processHandlerException,方便做全局异常处理
private void processDispatchResult(HttpServletRequest request, HttpServletResponse response,
                                   ModelAndView mv, Exception ex) throws Exception {
    if (Objects.nonNull(ex)) {
        //error ModelAndView
        mv = processHandlerException(request, response, ex);
    }

    if (Objects.nonNull(mv)) {
        render(mv, request, response);
        return;
    }

    logger.info("No view rendering, null ModelAndView returned.");
}processHandlerException返回的是一个异常处理后返回的ModeAndView,处理异常的方法本篇暂时不实现,下篇在实现了全局异常后在实现这个方法
//出现异常后的ModelAndView
private ModelAndView processHandlerException(HttpServletRequest request, HttpServletResponse response,
                                             Exception ex) {
    return null;
}
render 首先通过ViewResolver解析出视图,然后在调用View的render方法实施渲染逻辑
private void render(ModelAndView mv, HttpServletRequest request, HttpServletResponse response)
        throws Exception {

    View view;
    String viewName = mv.getViewName();
    if (!StringUtils.isEmpty(viewName)) {
        view = this.viewResolver.resolveViewName(viewName);
    } else {
        view = (View) mv.getView();
    }

    if (mv.getStatus() != null) {
        response.setStatus(mv.getStatus().getValue());
    }
    view.render(mv.getModel().asMap(), request, response);
}
DispatcherServlet完整的代码如下:
public class DispatcherServlet extends HttpServlet implements ApplicationContextAware {
    private Logger logger = LoggerFactory.getLogger(getClass());

    private ApplicationContext applicationContext;

    private HandlerMapping handlerMapping;
    private HandlerAdapter handlerAdapter;
    private ViewResolver viewResolver;


    @Override
    public void setApplicationContext(ApplicationContext applicationContext) throws BeansException {
        this.applicationContext = applicationContext;
    }


    @Override
    public void init() {
        this.handlerMapping = this.applicationContext.getBean(HandlerMapping.class);
        this.handlerAdapter = this.applicationContext.getBean(HandlerAdapter.class);
        this.viewResolver = this.applicationContext.getBean(ViewResolver.class);
    }

    @Override
    protected void service(HttpServletRequest request, HttpServletResponse response) throws ServletException, IOException {
        logger.info("DispatcherServlet.service => uri:{}", request.getRequestURI());
        RequestContextHolder.setRequest(request);

        try {
            doDispatch(request, response);
        } catch (Exception e) {
            logger.error("Handler the request fail", e);
        } finally {
            RequestContextHolder.resetRequest();
        }

    }

    private void doDispatch(HttpServletRequest request, HttpServletResponse response) throws Exception {
        Exception dispatchException = null;
        HandlerExecutionChain executionChain = null;
        try {
            ModelAndView mv = null;
            try {
                executionChain = this.handlerMapping.getHandler(request);

                if (!executionChain.applyPreHandle(request, response)) {
                    return;
                }
                // Actually invoke the handler.
                mv = handlerAdapter.handle(request, response, executionChain.getHandler());

                executionChain.applyPostHandle(request, response, mv);
            } catch (Exception e) {
                dispatchException = e;
            }
            processDispatchResult(request, response, mv, dispatchException);
        } catch (Exception ex) {
            dispatchException = ex;
            throw ex;
        } finally {
            if (Objects.nonNull(executionChain)) {
                executionChain.triggerAfterCompletion(request, response, dispatchException);
            }
        }

    }

    private void processDispatchResult(HttpServletRequest request, HttpServletResponse response,
                                       ModelAndView mv, Exception ex) throws Exception {
        if (Objects.nonNull(ex)) {
            //error ModelAndView
            mv = processHandlerException(request, response, ex);
        }

        if (Objects.nonNull(mv)) {
            render(mv, request, response);
            return;
        }

        logger.info("No view rendering, null ModelAndView returned.");
    }

    private void render(ModelAndView mv, HttpServletRequest request, HttpServletResponse response)
            throws Exception {

        View view;
        String viewName = mv.getViewName();
        if (!StringUtils.isEmpty(viewName)) {
            view = this.viewResolver.resolveViewName(viewName);
        } else {
            view = (View) mv.getView();
        }

        if (mv.getStatus() != null) {
            response.setStatus(mv.getStatus().getValue());
        }
        view.render(mv.getModel().asMap(), request, response);
    }

    //出现异常后的ModelAndView
    private ModelAndView processHandlerException(HttpServletRequest request, HttpServletResponse response,
                                                 Exception ex) {
        return null;
    }

}
13.2 单元测试
接下来我们来测试一下DispatcherServlet能否正确的处理请求
- 在AppConfig.java中创建
HandlerMapping、HandlerAdapter、ConversionService、ViewResolver
@Configuration
@ComponentScan(basePackages = "com.silently9527.smartmvc")
public class AppConfig {
    @Bean
    public HandlerMapping handlerMapping() {
        return new RequestMappingHandlerMapping();
    }
    @Bean
    public HandlerAdapter handlerAdapter(ConversionService conversionService) {
        RequestMappingHandlerAdapter handlerAdapter = new RequestMappingHandlerAdapter();
        handlerAdapter.setConversionService(conversionService);
        return handlerAdapter;
    }
    @Bean
    public ConversionService conversionService() {
        DefaultFormattingConversionService conversionService = new DefaultFormattingConversionService();
        DateFormatter dateFormatter = new DateFormatter();
        dateFormatter.setPattern("yyyy-MM-dd HH:mm:ss");
        conversionService.addFormatter(dateFormatter);
        return conversionService;
    }
    @Bean
    public ViewResolver viewResolver() {
        ContentNegotiatingViewResolver negotiatingViewResolver = new ContentNegotiatingViewResolver();
        negotiatingViewResolver.setViewResolvers(Collections.singletonList(new InternalResourceViewResolver()));
        return negotiatingViewResolver;
    }
    @Bean
    public DispatcherServlet dispatcherServlet() {
        return new DispatcherServlet();
    }

}- 我们再创建一个
DispatcherController
@Controller
@RequestMapping(path = "/test")
public class DispatcherController {

    @RequestMapping(path = "/dispatch", method = RequestMethod.GET)
    public String dispatch(@RequestParam(name = "name") String name, Model model) {
        System.out.println("DispatcherController.dispatch: name=>" + name);
        model.addAttribute("name", name);
        return "redirect:/silently9527.cn";
    }

}- 创建单元测试
public class DispatcherServletTest extends BaseJunit4Test {

    @Autowired
    private DispatcherServlet dispatcherServlet;

    @Test
    public void service() throws ServletException, IOException {
        dispatcherServlet.init(); //初始化

        MockHttpServletRequest request = new MockHttpServletRequest();
        request.setParameter("name", "silently9527"); //设置请求的参数name
        request.setRequestURI("/test/dispatch"); //设置请求的URI

        MockHttpServletResponse response = new MockHttpServletResponse();

        dispatcherServlet.service(request, response);

        //打印出头信息,判断是否正常的rediect,并且带上了name参数
        response.getHeaderNames().forEach(headerName ->
                System.out.println(headerName + ":" + response.getHeader(headerName)));
    }

}
执行结果如下:
13.3 总结
我们完成了 DispatcherServlet 正常的处理请求的逻辑,如果在处理请求的过程中出现了异常,该怎么处理呢?下篇我们将会来解决这个问题
13.4 延展
在SpringMVC中DispatcherServlet的初始化过程比较复杂,由于我们后面打算和springboot进行整合,所以就简单实现了初始化的过程,有兴趣的小伙伴自己去了解下DispatcherServlet的初始化过程是怎么样的,在后面的章节:浅谈Spring中ApplicationContext和WebApplicationContext的区别,我们也会谈到这个过程

